Installing an indoor basketball wood floor is one of the most precise construction tasks in sports facility building. A poorly installed floor will never perform correctly, no matter how high-quality the materials are. This article details the step-by-step process that professional installers follow to create a court-ready surface.
The process begins long before any wood touches the building. The subfloor must be inspected, tested, and prepared. For concrete slabs, the moisture content must be measured using a calcium chloride test or a relative humidity probe. If the moisture level is too high, the wood will absorb it, expand, and eventually warp or delaminate. The slab must also be tested for flatness. A straightedge and feeler gauges are used to check for deviations. The industry standard is no more than 1/8 inch in 10 feet, which is roughly 3 millimeters over 3 meters.
If the subfloor is plywood, it must be structurally sound with no soft spots, loose fasteners, or delaminated layers. The plywood should be at least 19 millimeters thick for most applications, and all seams should be secured with construction adhesive and screws. Gaps between sheets should be filled and sanded flush.
Once the subfloor passes inspection, the next step is acclimatization. The hardwood planks must be stored in the facility for a minimum of 48 to 72 hours before installation. This allows the wood to adjust to the temperature and humidity of the space. Skipping this step is one of the most common causes of post-installation problems.
The underlayment or shock pad is then installed. This layer goes directly on the subfloor and serves as the cushion between the rigid base and the flexible hardwood. The pads are typically rolled out in sections and secured with double-sided tape or adhesive. Seams must be tightly butted with no overlap, and the entire surface must be flat and free of wrinkles. Some systems use a grid pattern of sleepers (wooden battens) on top of the pads, and the hardwood is then nailed to the sleepers rather than glued to the pad. This floating system allows the floor to expand and contract with seasonal changes.
When the hardwood planks are ready to be laid, the installer begins from a reference wall. The first row is set with an expansion gap of approximately 10 to 12 millimeters from the wall. This gap is critical because hardwood expands and contracts with humidity changes. Without it, the planks will buckle and lift. The planks are laid in a staggered pattern, typically with joints offset by at least 300 millimeters from row to row. This creates a strong, stable surface that distributes loads evenly.
Each plank is secured using either nails or a floating click system. In a nailed installation, the planks are driven down through the tongue into the sleepers below. In a floating system, the planks click together and are not attached to the subfloor at all. Floating systems are more common in modern installations because they are faster to install and more forgiving of subfloor imperfections.
After all planks are laid, the floor is sanded. This is a multi-pass process using progressively finer grit sandpaper. The first pass removes any high spots or glue residue. Subsequent passes smooth the surface and prepare it for finishing. The sanding must be done with the grain, and dust must be collected with a high-efficiency vacuum to protect both the installer's health and the finish quality.
The finishing stage involves applying a protective coating. Most modern systems use a water-based polyurethane applied in two to three coats, with light sanding between each coat. The finish is applied using a high-quality mop or roller, and each coat must dry completely before the next is applied. The final coat is typically a matte or semi-gloss finish to reduce glare.
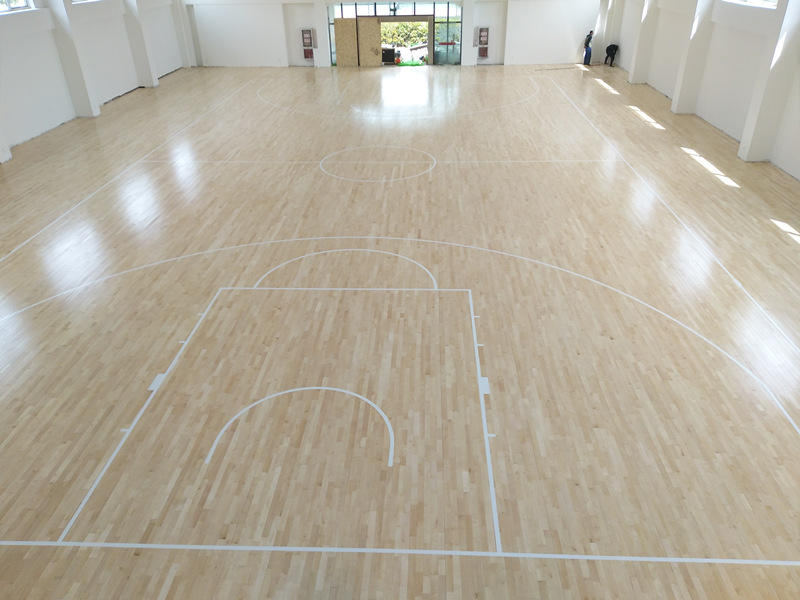
The last step is line painting. Court lines, the center circle, the three-point arc, and the free-throw lane are all painted according to the governing body's specifications. The lines must be crisp, straight, and the correct width. This is often done by a specialized painter using stencils and masking tape.
A properly installed indoor basketball wood floor should feel solid underfoot, have consistent ball bounce, and look professional. The entire process, from subfloor prep to final line painting, typically takes two to four weeks depending on the size of the court and the complexity of the system.
Leave a Reply