Installing hardwood flooring for an indoor basketball court is not a weekend DIY project. It is a precise, multi-stage process that can take several weeks from start to finish, depending on the size of the court and the condition of the existing subfloor. Getting the installation right is critical, because even the finest hardwood will perform poorly if it is not installed correctly.
The first step is subfloor preparation. The existing floor, whether it is concrete, plywood, or another material, must be inspected for levelness, moisture content, and structural soundness. The subfloor must be flat within three sixteenths of an inch over any ten-foot span. Any high spots must be ground down, and any low spots must be filled. Moisture is the silent killer of hardwood floors. If the subfloor has a moisture content above the threshold recommended by the flooring manufacturer, a moisture barrier must be installed. This is typically a polyethylene sheet or a liquid-applied membrane.
Once the subfloor is ready, the next step is laying the shock absorption system. This is the layer that sits between the subfloor and the hardwood. It is usually made of closed-cell foam or rubber pads. The thickness and density of these pads are carefully selected based on the target shock absorption rate. For most indoor basketball courts, the goal is a vertical deformation between 2.3 and 4.0 millimeters when a standard force is applied. This range provides enough cushion to protect players' joints without making the floor feel too soft.
After the shock absorption layer is in place, the hardwood planks are installed. This is typically done using a floating floor system, meaning the planks are not nailed or glued directly to the subfloor. Instead, they are connected to each other using a tongue-and-groove or similar interlocking system. This allows the floor to expand and contract with changes in temperature and humidity without buckling. The planks are laid in a pattern that maximizes structural stability. Most courts use a staggered pattern, similar to bricklaying, where the end joints of one row do not align with the end joints of adjacent rows.
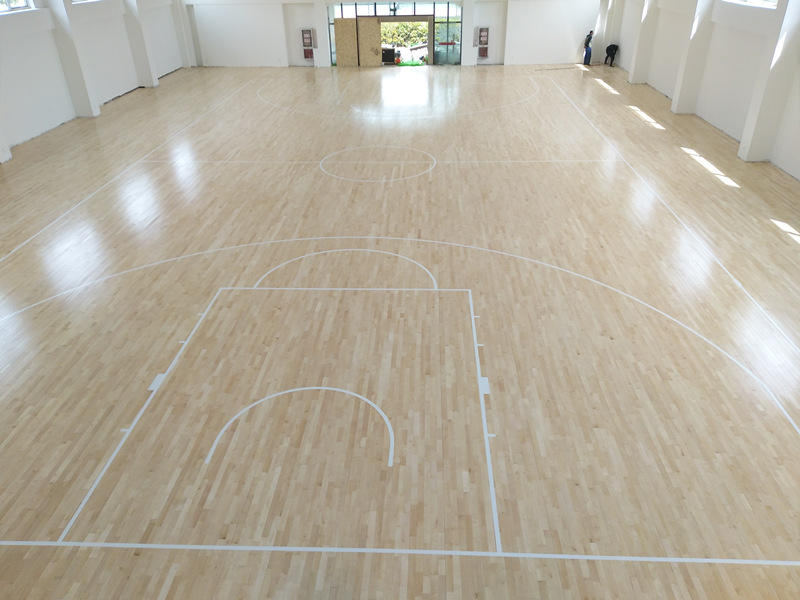
Orientation matters. In most basketball courts, the planks run parallel to the sidelines, which means they run perpendicular to the direction of most player movement. This orientation provides the best stability and the most consistent ball bounce. Some facilities choose to run the planks diagonally for aesthetic reasons, but this can slightly affect ball bounce consistency and is generally not recommended for competitive play.
Once the hardwood is laid, it must be acclimated. The wood needs time to adjust to the temperature and humidity of the facility. This typically takes 48 to 72 hours. During this time, the HVAC system should be running to maintain stable conditions.
After acclimation, the floor is sanded. This is a multi-pass process using progressively finer grits of sandpaper. The goal is to create a perfectly smooth, level surface. Any imperfections, gaps, or uneven spots are corrected during this stage. The dust from sanding must be carefully removed, as any particles left on the surface will be trapped under the finish.
The next step is applying the finish. Most indoor basketball court floors receive a polyurethane or similar hard finish. This is applied in multiple coats, with light sanding between each coat. The finish must be thin and even. Too thick, and it can become slippery or crack. Too thin, and it will not provide adequate protection. The final coat is typically a matte or satin finish, as high-gloss finishes can create glare under arena lighting.
Line painting is the final step. The court lines, three-point arcs, free-throw lanes, and center circle are painted using specialized paint designed for hardwood surfaces. The paint must be flexible enough to move with the wood without cracking.
The entire installation process, from subfloor prep to final line painting, requires skilled labor and careful quality control at every stage. Cutting corners at any point can lead to problems that are expensive and disruptive to fix later.
Leave a Reply