Installing wooden flooring for an indoor basketball court is one of the most complex and precise construction projects you will ever undertake. Unlike residential hardwood flooring, which can tolerate minor imperfections, a basketball court floor must be perfectly level, perfectly flat, and perfectly consistent across the entire playing surface. Even a fraction of a millimeter of variation can affect ball bounce, player safety, and the overall quality of the game. This article walks you through every step of the installation process, from preparation to final finishing.
The first step is subfloor preparation, and this is where many installations succeed or fail. The subfloor is typically a concrete slab, though in some cases it can be a plywood or OSB surface over a wood frame. Regardless of the material, the subfloor must be completely flat and level. This means using a long straightedge and level to check for high and low spots. Any deviations greater than three millimeters over a three-meter span must be corrected before the flooring is installed. Self-leveling compounds are often used to fill in low spots, while high spots are ground down using a floor grinder.
Moisture testing is absolutely critical at this stage. Concrete slabs can retain significant amounts of moisture, and if that moisture is not properly addressed, it will migrate up through the wood flooring and cause warping, cupping, and delamination. A calcium chloride test or a relative humidity test should be performed to ensure the moisture levels are within acceptable limits — typically below 75 percent relative humidity for most wood flooring systems. If moisture levels are too high, a moisture barrier must be installed before proceeding.
Once the subfloor is prepared and approved, the next step is to lay the underlayment or padding system. This is the layer that sits between the subfloor and the wood flooring, and it is responsible for shock absorption, sound dampening, and ball return. There are several types of padding systems available, including foam pads, rubber pads, and combination systems that use both materials. The choice of padding depends on the desired performance characteristics of the court. For competitive play, a combination system with a foam base and a rubber top layer is often preferred because it provides both excellent shock absorption and consistent ball return.
The padding must be installed in a specific pattern to ensure even coverage. Sheets or rolls are laid out across the entire subfloor, and seams are taped to prevent shifting. In some systems, the padding is installed in two layers with the seams of the second layer offset from the seams of the first layer, which eliminates any potential weak spots.
With the padding in place, it is time to install the wood flooring itself. For solid hardwood systems, the planks are typically nailed or stapled directly into the subfloor through the padding. The nails or staples are driven at an angle through the tongue of each plank and into the subfloor below. This creates a mechanically fastened floor that will not shift or move over time. The planks are installed in a staggered pattern, with each row offset from the previous one by at least thirty centimeters. This staggered pattern distributes the load evenly and prevents the floor from developing weak points.
For floating floor systems, the process is different. The planks are not fastened to the subfloor at all. Instead, they are laid on top of the padding and held in place by their interlocking edges. The first row is installed against one wall, and each subsequent row is clicked into the previous one. Because the floor is floating, it can expand and contract with changes in temperature and humidity without causing damage. This makes floating systems a good choice for facilities in climates with significant seasonal variation.
Regardless of the system, maintaining consistent spacing between planks is essential. Expansion gaps of approximately ten to twelve millimeters must be left around the entire perimeter of the court to allow the wood to move. These gaps are later covered by baseboards or quarter-round molding.
After all the planks are installed, the floor must be sanded. This is typically done in three passes using progressively finer grits of sandpaper. The first pass removes any high spots or imperfections, the second pass smooths the surface, and the third pass creates a uniformly smooth finish. The sanding dust must be completely removed between each pass using a commercial-grade vacuum.
The final step is applying the finish. As discussed in previous articles, there are two main types of finishes: water-based and oil-based polyurethane. The finish is applied using a high-quality applicator, typically a T-bar or a lambswool pad, in thin, even coats. Most basketball court floors receive between five and eight coats of finish, with light sanding between each coat to ensure adhesion and a smooth surface. The final coat should be allowed to cure for at least forty-eight to seventy-two hours before the court is used for any activity.
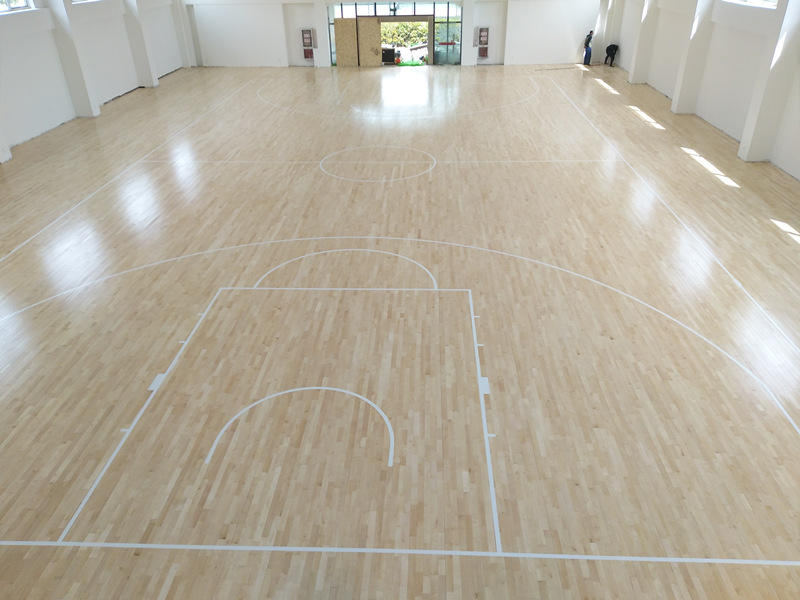
Line painting is the last step in the installation process. The court lines, including the boundary lines, free-throw lines, three-point line, and center circle, are painted using a high-quality athletic floor paint. The paint must be flexible enough to move with the wood without cracking, and it must be durable enough to withstand constant foot traffic and ball impacts.
Proper installation is the difference between a floor that performs beautifully for twenty years and one that fails in five. Never cut corners on subfloor preparation, moisture testing, or the finishing process. Hire experienced installers who specialize in athletic flooring, and insist on quality control checks at every stage of the process.
Leave a Reply