The installation of indoor sports wood flooring is one of the most precise and demanding construction processes in the building industry. A poorly installed floor will never perform correctly, no matter how high-quality the materials are. Understanding the installation process helps you set realistic expectations, manage your project timeline, and ensure the best possible outcome.
The process begins with subfloor preparation. The existing concrete slab or subfloor must be completely flat, clean, dry, and structurally sound. Flatness is measured using a straightedge and feeler gauges. For professional sports courts, the tolerance is extremely tight — typically no more than two millimeters of deviation over any two-meter span. Any high spots must be ground down, and any low spots must be filled with a leveling compound. Moisture testing is also critical. The concrete must have a moisture vapor emission rate below the threshold specified by the flooring manufacturer, usually around 3 to 5 pounds per 1,000 square feet per 24 hours. Excess moisture can cause the wood to warp, cup, or delaminate.
Once the subfloor is ready, the underlayment is installed. This may include a moisture barrier, foam pads for shock absorption, and a leveling layer. The underlayment is laid according to a precise layout plan that accounts for the orientation of the wood planks, the location of expansion gaps, and the placement of any drainage or ventilation features.
Next comes the hardwood installation. The planks are typically laid in a staggered pattern, with each row offset from the previous one for structural stability. The planks are either glued down or mechanically fastened to the subfloor, depending on the system being used. In a floating system, the planks are not attached to the subfloor at all — they rest on the underlayment and are held together by the tongue-and-groove joint. This allows the entire floor to expand and contract as a single unit.
After all planks are laid, the floor must acclimate. This means letting the wood sit in the facility for several days to adjust to the temperature and humidity of the environment. Rushing this step is one of the most common installation mistakes and can lead to gaps, cupping, or crowning once the floor is in use.
Once acclimated, the floor is sanded to achieve perfect flatness. This is done using large drum sanders that remove a thin layer from the entire surface. The sanding process is repeated multiple times with progressively finer grits of sandpaper. The goal is a surface that is smooth, level, and free of any imperfections.
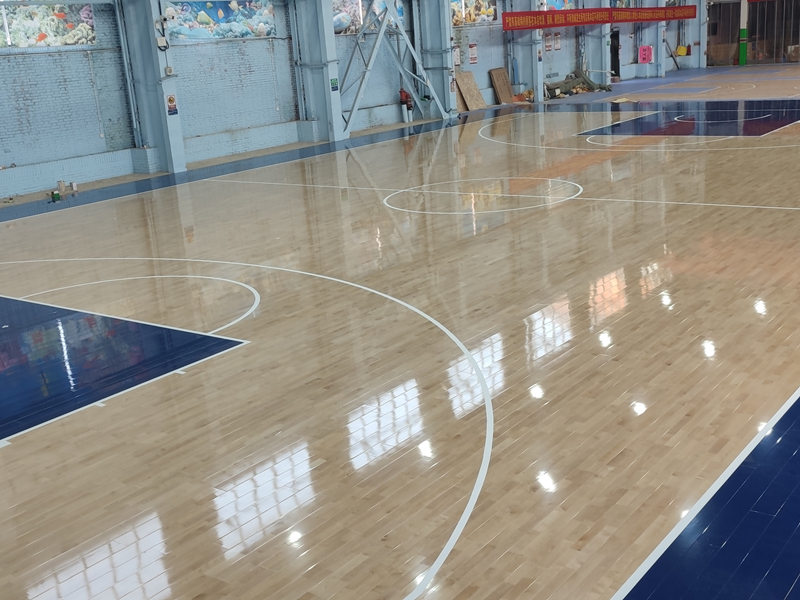
The final step is the application of the sports finish. The finish is applied in multiple coats, with sanding between each coat. The number of coats depends on the type of finish being used. After the final coat is applied and cured, the court is ready for use.
The entire installation process typically takes two to four weeks for a standard-sized court, depending on the complexity of the subfloor and the weather conditions. Patience during this phase pays off enormously in the long-term performance of the floor.
Leave a Reply