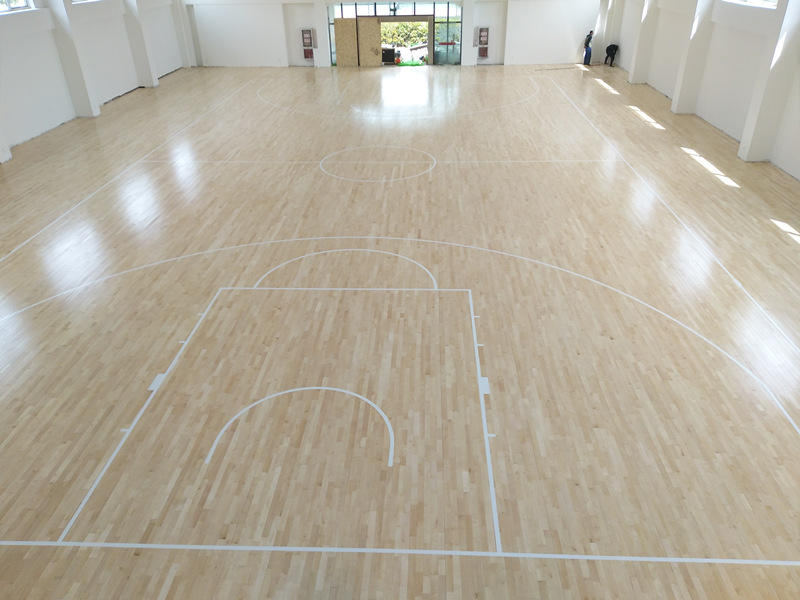
Introduction: Why Installation Method Matters
The installation method for indoor sports wooden flooring is not merely a construction detail — it fundamentally determines the floor's performance, durability, maintenance requirements, and even its eligibility for professional certification. A beautifully selected wood species and subfloor system can underperform or fail prematurely if installed incorrectly.
This article examines every major installation method used in sports flooring, including their advantages, limitations, ideal applications, and technical requirements.
The Five Primary Installation Methods
- Nailed-down to wooden subfloor
- Glued-down to concrete or wood
- Floating (unattached) system
- Screwed-down to wooden subfloor
- Modular interlocking panels
Each method has distinct implications for shock absorption, moisture management, accessibility, and future maintenance.
Method 1: Nailed-Down Installation
The traditional and most widely used method for sports wood flooring on wooden subfloors.
Process:
- Subfloor (typically 18-24mm plywood or OSB) is laid on joists and fastened with screws or nails
- A moisture barrier (polyethylene sheeting, 0.2mm minimum) is applied over the subfloor
- Flooring panels (typically 70mm wide, 300-600mm long, 20-26mm thick) are installed using pneumatic cleat nailers
- Nails are driven through the tongue of each panel into the subfloor at a 45-degree angle
- Panels are staggered in a running bond pattern
Advantages:
- Proven, reliable method with decades of track record
- Excellent dimensional stability — panels won't shift or move
- Allows for very flat, consistent playing surface
- Compatible with all shock absorption systems
- Preferred by most governing bodies (FIBA, FIVB, etc.)
Disadvantages:
- Permanent installation — difficult to access plumbing or electrical beneath
- Requires skilled labor and specialized equipment (pneumatic nailers)
- Subfloor must be very flat (typically <3mm over 2m)
- Repair of individual panels requires cutting out and replacing
Technical Requirements:
- Joist spacing: typically 400mm on center (16 inches) for 18mm subfloor; 600mm (24 inches) for 24mm subfloor
- Subfloor deflection: L/360 under live load (where L = joist span)
- Nail type: 40-50mm long, ring-shank or spiral-shank for holding power
- Acclimatization: 48-72 hours minimum at installation site
Method 2: Glued-Down Installation
Commonly used when the subfloor is concrete or when a completely rigid connection is desired.
Process:
- Concrete subfloor is prepared (ground, cleaned, moisture-tested)
- Primer is applied to the concrete
- Polyurethane or moisture-cure adhesive is spread on the subfloor
- Flooring panels are pressed into the adhesive and rolled for full contact
- Panels may also be mechanically fastened for added security during cure
Advantages:
- Creates an extremely rigid, stable surface
- Excellent for concrete subfloors where nailing is not possible
- Very flat result — minimal movement between panels
- Good acoustic properties (reduces hollow sound)
Disadvantages:
- Extremely difficult to repair or replace individual panels
- Moisture management is critical — any moisture trapped under the glue can cause catastrophic failure (delamination, mold)
- Adhesive selection is critical — wrong adhesive can react with wood or fail prematurely
- Not ideal for shock absorption systems that need some movement
Technical Requirements:
- Concrete moisture: <75% RH (relative humidity) or <3 lbs/1000 sq ft/24hr (calcium chloride test)
- Adhesive coverage: minimum 80% contact area (ideally 100% with spread-and-roll method)
- Surface preparation: shot blasting or diamond grinding to open concrete pores
- Working time: adhesive must remain workable long enough to position all panels (typically 20-40 minutes)
Method 3: Floating Installation
A increasingly popular method, particularly for multi-purpose facilities and renovation projects.
Process:
- Moisture barrier is laid on subfloor
- Shock absorption pads (rubber, foam, or combination) are laid on the barrier
- Flooring panels are laid on top of the pads, interlocked or butted together
- Panels are NOT fastened to the subfloor — they "float" on the cushion layer
- Perimeter weighting or tack strips may be used to prevent lateral movement
Advantages:
- Fast installation — no nailing or gluing required
- Easy access to subfloor for future modifications
- Excellent shock absorption (the floating layer adds inherent cushioning)
- Can be installed over existing hard floors (concrete, tile, existing wood)
- Good for renovation projects where subfloor cannot be disturbed
Disadvantages:
- Panels can shift over time if not properly secured at perimeter
- May not meet requirements for professional sports certification (some governing bodies require mechanical fastening)
- Acoustic properties can be hollow without proper underlayment
- Edge gaps may develop if moisture changes cause expansion
Technical Requirements:
- Perimeter expansion gap: 10-15mm (covered by baseboard/trim)
- Underlayment thickness: typically 3-10mm depending on desired shock absorption
- Panel locking: tongue-and-groove or click-lock systems preferred
- Total system height: must account for underlayment + panel thickness for door clearances
Method 4: Screwed-Down Installation
Similar to nailed-down but uses screws instead of nails. Preferred in some European installations and for thicker panels.
Process:
- Identical to nailed-down, but countersunk wood screws (typically 50-65mm long) are used instead of cleat nails
- Screws are driven through pre-drilled holes in the panel tongue
- Screws are typically placed every 200-300mm along each joist line
Advantages:
- Stronger holding power than nails — less risk of panel lifting
- Easier to remove and replace individual panels (screws can be unscrewed)
- Better for thicker panels (24mm+) where nails may not penetrate adequately
- Preferred in high-humidity environments where nail corrosion is a concern
Disadvantages:
- Slower installation than nailing
- Screw heads must be filled and sanded, adding labor
- Higher material cost (screws vs. nails)
- Pre-drilling required to prevent splitting
Method 5: Modular Interlocking Panels
A specialized system where pre-finished panels connect to each other without any subfloor attachment.
Process:
- Panels have precision-machined interlocking edges (male/female profiles)
- Panels are laid on a prepared subfloor with underlayment
- Each panel locks to its neighbors, creating a continuous surface
- The entire floor can theoretically be disassembled and reassembled
Advantages:
- Fastest installation method — panels simply click together
- Fully removable and relocatable — ideal for temporary or multi-use facilities
- No damage to subfloor
- Excellent for facilities that need to convert between sports (e.g., basketball to volleyball)
Disadvantages:
- Interlocking joints can create slight height variations if not installed perfectly
- May not achieve the same flatness as nailed/screwed systems
- Joint integrity can degrade over time with heavy use
- Limited availability — not all manufacturers offer interlocking systems
Choosing the Right Method: Decision Framework
| Factor | Nailed | Glued | Floating | Screwed | Modular |
|---|---|---|---|---|---|
| Subfloor type | Wood | Concrete | Any | Wood | Any |
| Professional certification | ✅ Yes | ✅ Yes | ⚠️ Sometimes | ✅ Yes | ⚠️ Sometimes |
| Shock absorption | ✅ Excellent | ⚠️ Limited | ✅ Excellent | ✅ Excellent | ✅ Good |
| Ease of repair | ⚠️ Moderate | ❌ Difficult | ✅ Easy | ✅ Easy | ✅ Very Easy |
| Installation speed | Moderate | Slow | Fast | Slow | Very Fast |
| Cost | Moderate | High | Low-Moderate | High | Moderate |
| Moisture tolerance | Good | Poor | Good | Good | Good |
Special Considerations for Different Facilities
Professional Sports Arenas: Nailed or screwed to wooden subfloor is virtually mandatory. Governing body certifications typically require mechanical fastening. Shock absorption is achieved through the subfloor system (rubber pads, etc.).
School Gymnasiums: Floating or nailed systems are both common. Floating is popular for its speed and shock absorption. Budget often drives the decision.
Community/Recreation Centers: Floating systems are ideal due to ease of installation and excellent shock absorption for recreational users who may be less physically conditioned.
Fitness Centers: Floating or modular systems work well, as these facilities often need to accommodate multiple activities and may renovate frequently.
Renovation Projects: Floating systems are almost always the best choice, as they can be installed over existing surfaces without subfloor preparation.
Moisture Management: The Universal Concern
Regardless of installation method, moisture management is the single most important factor in sports flooring longevity. Wood moves — it expands across the grain when it absorbs moisture and contracts when it dries. Uncontrolled movement leads to cupping, crowning, gapping, and buckling.
Best practices:
- Always install a polyethylene moisture barrier (minimum 0.2mm / 6 mil) between subfloor and flooring
- Test concrete moisture before any installation (RH test preferred)
- Maintain indoor humidity between 40-60% RH
- Ensure HVAC system is properly sized and balanced
- Address any water leaks or plumbing issues before installation
- Use acclimatized materials (48-72 hours at site conditions)
Quality Control During Installation
Regardless of method, these quality checks should be performed:
- Flatness test: Use a 2m straightedge — no more than 2mm deviation
- Moisture test: Verify wood moisture content (8-12% ideal) and subfloor moisture
- Panel alignment: Check that all panels are aligned and gaps are uniform (typically 3mm maximum between panels)
- Fastener check: For nailed/screwed systems, verify fastener spacing and depth
- Adhesion test: For glued systems, pull-test a sample panel
- Finish inspection: Check for scratches, dents, or finish defects before use
Conclusion
The installation method for indoor sports wooden flooring should be selected based on the subfloor type, facility use, performance requirements, budget, and long-term maintenance strategy. There is no single "best" method — each has its place.
For new construction professional facilities, nailed or screwed installation to a wooden subfloor remains the gold standard. For renovation, multi-purpose, or budget-conscious projects, floating systems offer compelling advantages. And for facilities that need maximum flexibility, modular interlocking panels provide unmatched versatility.
Whatever method you choose, invest in quality installation. A sports floor is only as good as the person who installs it. Hire experienced installers, follow manufacturer specifications precisely, and verify performance through accredited testing.
Leave a Reply