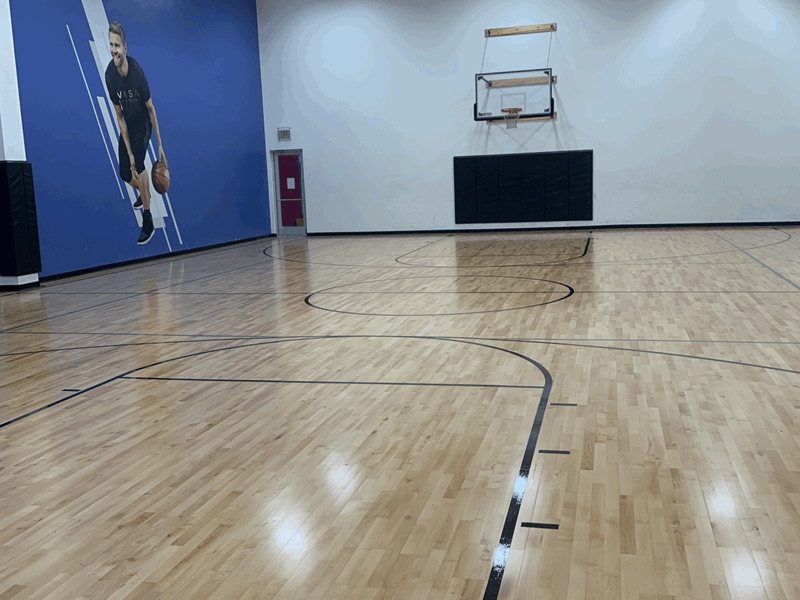
Introduction
The ability to transform a massive multi-use arena from an ice hockey rink or a convention hall into a professional-grade basketball court within a matter of hours is one of the most remarkable operational feats in the sports and entertainment industry. This rapid changeover relies heavily on the efficiency of the venue's operations crew and the design of the portable wood flooring system. However, speed must never come at the expense of safety, quality, or structural integrity. Improper installation of a portable wood court can result in damaged floor panels, inconsistent ball bounce, dangerous tripping hazards, and compromised athletic performance. To ensure a flawless installation, arena management must adhere to a strict set of industry best practices. This article details the comprehensive step-by-step process and critical protocols required for the successful assembly of a temporary indoor basketball court wood floor.
Pre-Installation Site Preparation
The success of any portable court installation begins long before the first wooden panel is unloaded from its transport cart. Proper environmental and site preparation is essential to prevent long-term damage to the wood and ensure a flat playing surface.
Subfloor Inspection and Leveling
The host floor (the concrete slab, insulated ice deck, or synthetic turf) must be thoroughly inspected. It must be clean, dry, and completely free of debris like dust, gravel, or spilled liquids. Even a tiny pebble trapped beneath a floor panel can prevent it from sitting flat, creating a prominent "dead spot" and potentially cracking the plywood subfloor under heavy dynamic loads. The flatness of the host floor must be verified; typically, the substrate should not vary by more than 1/8 inch over a 10-foot radius. Any major depressions or high spots must be addressed before proceeding.
Climate Acclimatization
Wood is a hygroscopic material, meaning it absorbs and releases moisture based on the surrounding relative humidity. Ideally, the portable floor panels should be stored in an environment that matches the temperature and humidity of the competition arena. If the storage area is significantly colder or more humid than the arena, the panels must be allowed to acclimate in the main hall for at least 24 to 48 hours before assembly. Failing to acclimate the wood can lead to rapid expansion or contraction post-installation, resulting in cupping, warping, or buckling of the court during play. The arena's climate control system (HVAC) should maintain a stable temperature between 65°F and 75°F (18°C to 24°C) and a relative humidity between 35% and 50%.
Laying the Vapor Barrier
Once the substrate is prepared, a high-quality moisture-resistant barrier is laid down across the entire footprint of the court. Typically, this is a 6-mil polyethylene plastic sheeting. The sheets must overlap by at least 6 to 12 inches at the seams, and the joints must be securely taped with heavy-duty moisture-resistant tape. This barrier prevents moisture from rising up through the concrete slab and penetrating the underside of the wooden floor panels.
Step-by-Step Assembly Process
Assembling a portable basketball court is a highly structured process that resembles putting together a giant, precise jigsaw puzzle. The panels must be installed in a specific sequence to ensure proper alignment and locking.
1. Determining the Centerline and Baselines
Before laying any panels, the installation crew must establish the exact center of the arena floor using laser levels or chalk lines. The primary longitudinal and transverse centerlines of the basketball court are marked directly onto the vapor barrier. This serves as the reference guide. The installation must begin from these centerlines and work outward to prevent cumulative alignment errors that could cause the outer edges of the court to drift out of square.
2. Laying the First Row
The first row of panels is laid precisely along the established centerline. Because portable courts are designed to lock together in a specific orientation, the crew must pay close attention to the direction of the tongue-and-groove profiles and the locking pins. The first row must be perfectly straight; even a fraction of a degree of misalignment in the first row will amplify as more rows are added, leading to massive gaps at the outer edges of the court.
3. Implementing the Staggered Brick Pattern
Subsequent rows are installed using a staggered brick pattern. This means that each panel in the second row is offset by half its length (typically 4 feet) relative to the panels in the first row. This staggered configuration is critical for structural strength, as it prevents continuous horizontal seams across the court, distributing athletic loads and preventing lateral sliding of the floor panels during play.
4. Engaging the Locking Mechanisms
As each panel is slid into place, the interlocking hardware must be immediately engaged.
- For pin-and-loop systems, the installer must ensure that the steel pins are fully seated in their brackets before moving to the next panel.
- For latching/cam-lock systems, a technician must use a specialized T-handle hex wrench to turn the lock mechanism, pulling the panels tightly together. The technician must ensure that the locks are tightened to the manufacturer's specified torque to prevent over-tightening (which can damage the wood) or under-tightening (which leads to loose joints).
5. Installing the Perimeter Ramps
Once all the primary court panels (usually around 250 panels) are locked into place, the perimeter transition ramps are installed around the entire boundary. These ramps lock the outer panels together, provide a safe slope for players running off the court, and prevent the entire floor system from sliding horizontally. In many professional setups, the perimeter ramps are anchored directly into the concrete floor using specialized pins or expansion anchors.
Post-Assembly Quality Control
After the court is fully assembled, the supervisor must conduct a thorough quality control inspection before handing the floor over to the athletes.
- Seam and Lip Inspection: The crew must walk the entire court, checking for any raised edges (lips) between panels. Any lip exceeding 1/32 of an inch must be corrected, as it presents a severe tripping hazard and can damage the wood during play.
- Dead Spot Testing: A basketball is bounced across various areas of the court, particularly along the panel seams. Any noticeable change in bounce height or sound (such as a hollow, rattling noise) indicates a loose lock, a missing resilient pad, or debris trapped beneath the panel, which must be immediately resolved.
- Surface Cleanliness: The court must be thoroughly swept and damp-mop with a specialized, non-residue wood floor cleaner to remove any dust, dirt, or shoe scuff marks accumulated during the installation process.
Conclusion
A world-class portable indoor basketball court wood floor is only as good as its installation. By adhering to strict pre-installation checks, ensuring precise climate control, following a disciplined, center-out assembly process, and conducting thorough post-installation inspections, venue operators can maximize both player safety and the lifespan of the floor. Efficient, disciplined installation protocols not only protect a significant capital investment but also ensure that the arena can transition between events with speed, precision, and absolute professional confidence.
Leave a Reply